Call CA Tally HelpDesk
+91 9205471661,
7428779101

The e-Way Bill system was introduced by the government to simplify and streamline the process of GST compliance. An e-Way Bill document has to be carried while shipping the goods from one location to another. This document will carry the e-Way Bill number and other relevant details. Accordingly, TallyPrime is here with a smooth e-Way Bill experience for you and your business. The best part is that Tally’s e-Way Bill solution is based on regular invoicing activity, and does not require any special expertise.
As a registered dealer, if you are shipping material worth more than Rs 50,000, then you have to generate an e-Way Bill from the portal by entering necessary information such as the details of the buyer, the quantity and HSN code of the goods, transporter ID, and so on. After you upload these details, an e-Way Bill number will be generated for this particular transaction. You have to print the e-Way Bill number and other details along with the invoice, and furnish them on the way, if needed. For example, an assessing officer might inspect the shipment, and might cross-check the e-Way Bill information with the goods being transported.
TallyPrime’s e-Way Bill solution is simple and is based on regular invoicing activity. For example, if you use TallyPrime, then you only have to record your sales transactions as usual, and your e-Way Bill requirement will be covered in the same flow. Important details will be updated in the vouchers automatically, and you can proceed to print them. Moreover, TallyPrime will ensure that both your business accounts and compliance requirements are suitably addressed.
TallyPrime also provides you with the flexibility to generate e-Way Bill in bulk for multiple invoices. If you do not want to generate the e-Way Bill while recording the transaction, then you can select one or more transactions from the Exchange menu and generate the e-Way Bill at your convenience. Moreover, TallyPrime also provides you with an option to cancel the e-Way Bill or update details such as Bill Part B and Transporter ID.
We understand how valuable your data is for you and your business, and we have provided various measures in TallyPrime to safeguard your data. All the requests for online e-Way Bill generation will pass through Tally GSP (TIPL), which has been awarded ISO 27001:2013 certificate for its stringent security policies. The best part is that you will not need any additional software or plugins to enjoy the benefits of e-Way Bill in TallyPrime.
Do you have any queries about e-Way Bill in TallyPrime? Check out our FAQ page.
One-Time Simple Setup
Getting started with e-Way Bill is easy! You only have to create your e-Way Bill profile on the portal and enable e-Way Bill in TallyPrime.
In this section
- Create e-Way Bill Profile on the Portal
- Enable e-Way Bill in TallyPrime
Create e-Way Bill Profile on the Portal
To get started with e-Way Bill, you have to first register your business on the e-Way Bill portal, and then create an API user profile by selecting Tally India Pvt Ltd as your GSP.
Register on e-Way Bill portal
- Open the e-Way Bill portal, and click Registration > e-Way Bill Registration.
- Enter the GSTIN of your business in the following e-Way Bill Registration Form, followed by the CAPTCHA code, and click Go.
The business details will appear as per the GSTIN entered.
- Click Send OTP to verify the details.
If you want to update any details, then click Update from GST Common Portal. The latest data will be fetched from the GST portal.
- Enter the code received on your registered mobile number, and click Verify OTP.
After verifying the OTP, you will have to enter a username and password to create your login credentials.
Create API User Profile
- Open the e-Way Bill portal, and click Login.
- Log in with the username and password created earlier.
- Click Registration > For GSP.
The following screen appears, where the e-mail ID and mobile number will be prefilled.
- Click Send OTP. An OTP will be sent to the registered mobile number.
- Enter the OTP and click Verify OTP.
Once the OTP is verified, the following screen appears, where you can add your preferred GSP.

- Select Add/New. The following screen appears.
- Select Tally (India) Private Limited IPL under GSP Name.
- Enter your preferred username and password, and click Add to save the details.
The API user credential is different from your e-Way Bill credential.
A user profile will be created with Tally (India) Private Ltd as the GSP. You have to use these API credentials in TallyPrime to log in to the e-Way Bill portal and perform online e-Way Bill-related activities from TallyPrime.
Enable e-Way Bill in TallyPrime
To enjoy the benefits of e-Way Bill in TallyPrime, you have to enable the e-Way Bill facility in your company features.
- Press F11 and set Enable Goods and Services (GST) to Yes. The GST Details screen opens.
- Set the option e-Way Bill applicable to Yes. You will find options to set the date of applicability, threshold limit, and so on. You also have the option to generate e-Way Bill details along with the e-invoice, if required.
- Set the required details and accept the screen. As always, you can press Ctrl+A to save the details.
Online e-Way Bill
TallyPrime provides you with an online e-Way Bill solution that fits right into your regular invoicing process. e-Way Bill in TallyPrime isn’t restricted to only a particular voucher type. Apart from regular sales invoice, TallyPrime also supports e-Way Bill for POS, debit notes, and credit notes. What’s more, even receipts and journal vouchers are supported for e-Way Bill when they are used for sales.
No matter how you record your supplies in TallyPrime, you can easily generate the e-Way Bill number while saving your invoice and print the QR code and other details. Later, if you want to update the details of your transaction, then you can easily cancel the current e-Way Bill number and get a fresh one for your updated invoice. This will ensure that the details in your e-Way Bill are up-to-date.
TallyPrime also provides you with the flexibility to generate multiple e-Way Bills at the same time. If you do not want to generate the e-Way Bill while recording the transaction, then you can do it later from the e-Way Bill report. You can select one or more transactions from the sections in the report and generate the e-Way Bill.
Moreover, you also have the choice of generating the e-Way Bill along with your e-invoice, or even generate the e-invoice without the e-Way Bill, if required.
Prerequisites
Before proceeding with online e-Way Bill generation, ensure that:
- You are connected to the internet.
- You are logged in with your e-Way Bill credentials.
- You have enabled e-Way Bill in TallyPrime.
In this section
- Generate e-Way Bill
- Generate e-Way Bill in Bulk
Generate e-Way Bill
You can easily generate an e-Way Bill while saving your invoice and also print the QR code and other details. If you want to generate your e-Way Bill details along with your e-invoice, then set the option Send e-Way Bill details with e-Invoice to Yes in your company (F11) features.
Record a GST Sales transaction, as usual.
-
Under Party A/c name, select the party. The Dispatch Details screen will appear.
-
Enter the required details and press Enter.
The Party Details screen will appear. This will be prefilled as per the information provided in the party ledger.
-
Update the Party Details, if required, and press Enter to proceed to the transaction.
- Specify other voucher details, such as the Sales ledger, Name of Item, GST ledger, and so on.
- Set the option Provide GST/e-Way Bill details to Yes. The Additional Details: Sales Taxable screen will appear. The e-Way Bill will be generated based on the details entered in this screen.
- Dispatch from and Ship to: This will be prefilled based on the address provided in the Company and Party ledger, respectively. You can update this, if required.
- Distance (in Km): This is the distance between the addresses of the Consignor and Consignee. The validity of your e-Way Bill depends on the distance entered in this field. The next time you record a transaction for this party, the distance will be prefilled based on the address and PIN code entered in the Party ledger.
- Transporter Name: Select the Transporter Name. You can set it as None if you are transporting the goods using your own or hired vehicle, or if you are using a different mode of transport such as Rail, Air, or Ship.
- Transporter ID: Enter the Transporter ID provided by the transporter.
If Part B Details are available, then you can enter the following details.
- Mode: Select the mode of transport, such as Road, Rail, Air, or Ship. You can also create a New Mode, if required.
- Vehicle Number: Specify the number of the vehicle used for transporting the goods.
- Vehicle Type: Specify the size of the vehicle, such as Regular, Over Dimensional Cargo, and so on. You can also create a New Vehicle Type, if required.
Press Enter to proceed to the transaction.
-
Press Ctrl+A to save.
A confirmation screen for e-Way Bill generation will appear.
-
Press Enter to proceed. The e-Way Bill Login screen will appear.
-
Enter your Username and Password.
You will remain logged in for the next six hours, provided you do not turn off the computer or reset your credentials.
-
Press Enter. TallyPrime will start exchanging information with the e-Way Bill system.
After the exchange of information, a confirmation message will appear.
You can see a preview of the invoice.
-
Press Page Down to view the generated e-Way Bill with all the relevant details and QR Code.
The e-Way Bill No. and Validity Date will also get updated in the Additional Details screen. If you want to explore additional options for configuring your e-Way Bill, then you can press Ctrl+I (More Details) or F12 (Configure).
Generate e-Way Bill in Bulk
If you do not want to generate the e-Way Bill while recording the transaction, then you can do it later from the Exchange menu. You can select one or more transactions and generate the respective e-Way Bill number for your vouchers. Ensure that you have disabled the option Send e-Way Bill details after saving the voucher in the F12 configuration of the voucher.
- Press Alt+Z > Send for e-Way Bill. The Send for e-Way Bill screen appears. You can view the transactions that are pending for generation and cancellation.

- Select the required transactions and press S (Send) to send the details. If you press S without selecting any transaction, then all the transactions will be sent.
The following confirmation screen will appear, with the number of transactions lined up for e-Way Bill generation.

- Press Enter to continue.
- Specify the e-Way Bill Login details and press Enter to continue.
TallyPrime will start exchanging information with the e-Way Bill system. After the exchange of information, a confirmation message will appear.
You will get an idea of how many e-Way Bills were generated or rejected by the portal, or if any transactions could not be uploaded due to technical difficulties.
For more details, you can go the e-Way Bill report. You can drill down to the transactions under the relevant sections, and update them as needed. Then you can then resend the transactions for e-Way Bill generation.
Other e-Way Bill Activities
Apart from e-Way Bill generation, TallyPrime provides a host of other features such as Cancel e-Way Bill, Undo Cancellation, Get EWB Information, and so on. You also have the option to update details such as e-Way Bill Part B and Transporter ID. You can also extend the e-Way Bill in TallyPrime, if needed.
In this section
- Cancel e-Way Bill
- Undo EWB Cancellation
- Get EWB Information
- Update e-Way Bill Part B
- Undo Part B Updation
- Extend e-Way Bill
- Undo EWB Extension
Cancel e-Way Bill
There may be situations where the e-Way Bill is generated for a particular voucher, but you might have to cancel it. This can happen when there is a change in the rate or quantity of a stock item, or if the party has cancelled the order. In such cases, you may want to cancel the e-Way Bill.
- Gateway of Tally > Display More Reports > GST Reports > e-Way Bill > press Enter.
Alternatively, Alt+G (Go To) > type or select e-Way Bill > press Enter.

- Drill down from the relevant section; for example, the Without Part B section under e-Way Bill Generated.
- Select the voucher for which the e-Way Bill needs to be cancelled.

- Press F10 (Cancel EWB). The e-Way Bill Cancellation Details screen will appear.
- Select the Reason for cancellation and enter the Remarks.
- Accept the screen. As always, you can press Ctrl+A to save the details.
The transaction will move to the For e-Way Bill Cancellation section under Pending for Exchange with e-Way Bill System.
You might have cancelled the e-Way Bill through some other medium on the portal, and you want to update the status in Tallyprime. In such cases, select the voucher (in the e-Way Bill report) and press Ctrl+F10 (Mark as Cancelled). This voucher will move to the Marked as e-Way Bill cancelled section under e-Way Bill Cancelled, instead of the For e-Way Bill Cancellation section under Pending for Exchange with e-Way Bill System.
Now you can send the e-Way Bills for cancellation from the Exchange menu.
- Press Alt+Z > Send for e-Way Bill. The Send for e-Way Bill screen appears. You can view the transactions that are pending for cancellation.
- Select the required transactions and press S (Send) to send the details. If you press S without selecting any transaction, then all the transactions will be sent.
The following confirmation screen will appear, with the number of transactions lined up for e-Way Bill cancellation.
- Press Enter to continue.
- Specify the e-Way Bill Login details and press Enter to continue.
TallyPrime will start exchanging information with the e-Way Bill system. The Exchange Summary will appear after the cancellation is completed. You will get an idea of how many e-Way Bills were cancelled or rejected by the portal, or if any transactions could not be uploaded due to technical difficulties.
The voucher will move to the e-Way Bill cancelled from e-Way Bill system section of the e-Way Bill report. Even after cancellation, the information like QR code and e-Way Bill number will be retained in the voucher for your reference in TallyPrime. You can also view the remarks you had entered while cancellation using More Details.
Undo EWB Cancellation
In certain situations, you may have cancelled the e-Way Bill for a particular voucher in TallyPrime, but you may want to undo this cancellation. For example, this might be needed when you had selected the wrong voucher for cancellation, or you had sent an e-Way Bill to the portal for cancellation, but it was rejected. In such cases, you can undo the cancellation of the e-Way Bill.
You can select the voucher from the relevant section in the e-Way Bill report and proceed to undo e-Way Bill cancellation. When you undo e-Way Bill cancellation for a voucher, it will remove the details of the cancellation, such as the Cancelled status, the Reason for cancellation, and the Remarks, and move the voucher to its original section in the e-Way Bill report.
- Drill down from the relevant section in the e-Way Bill report; for example, the Pending for e-Way Bill cancellation screen.
- Select the voucher and press Alt+F10 (Undo Cancellation). The following screen appears:
- Press Enter to proceed.
This will remove details of the cancellation (such as the Reason for cancellation and Remarks), and the voucher will move to its original section.
Get EWB Information
Sometimes, you may have generated or cancelled the e-Way Bill for vouchers in the offline mode using TallyPrime or some other software (or directly on the portal), and you may want to import the e-Way Bill information for those vouchers in TallyPrime. You can do so using the Get EWB Info facility, which will import the latest e-Way Bill number and other details from the portal to the vouchers.
This facility is available in the relevant sections of the e-Way Bill report, such as Pending for Exchange with e-Way Bill System, Exported, or Rejected by e-Way Bill System, where you can fetch the latest information and update the vouchers.
- Drill down from the relevant section in the e-Way Bill report; for example, the Pending for e-Way Bill generation screen.
-
Select the voucher and press F6 (Get EWB Info). The following screen appears:
- Press Enter to proceed.
- Specify the e-Way Bill Login details and press Enter to continue.
TallyPrime will start exchanging information with the e-Way Bill system. TallyPrime will fetch the latest e-Way Bill information from the portal, and the voucher will be updated and moved to the e-Way Bill Generated section.
Update e-Way Bill Part B
If Part B details were not available, then you might have generated the e-Way Bill without Part B for a few transactions. However, TallyPrime provides you with the option to update these details from the e-Way Bill report, whenever it is convenient for you.
- Drill down from the relevant section in the e-Way Bill report; for example, the For Part B updation section under Pending for Exchange with e-Way Bill System.
- Select the transactions for which you want to update Part B, and press F7 (Update Part B).
The Part B Updation Details screen appears.
- Select the Mode of transport from the options available.
- Enter the Vehicle Number
- Select the Vehicle Type.
- Accept the screen. As always, you can press Ctrl+A to save the details.
Now you can send the transaction for Part B updation through the Exchange menu.
- Press Alt+Z > Send for e-Way Bill. The Send for e-Way Bill screen appears. You can view the transactions that are pending for Part B Updation.

- Select the required transactions and press S (Send) to send the details. If you press S without selecting any transaction, then all the transactions will be sent.
The following confirmation screen will appear, with the number of transactions lined up for Part B updation.
- Press Enter to continue.
- Specify the e-Way Bill Login details and press Enter to continue.
TallyPrime will start exchanging information with the e-Way Bill system. The Exchange Summary will appear after the updation is completed.
After updation, the voucher will move to the e-Way Bill generated With Part B section of the e-Way Bill report.
Undo Part B Updation
If you had cancelled the updation of Part B on the e-Way Bill portal, because of the change in transporter or some other issues, then you can undo this updation in TallyPrime. The vouchers will then move to their previous section in the e-Way Bill report.
- Drill down from the relevant section in the e-Way Bill report; for example, the With Part B section under e-Way Bill Generated.
- Select the transactions and press Alt+F7 (Undo Part B Updation). The following confirmation screen will appear:
- Press Enter to proceed.
The transaction will move from this section and appear in its previous section.
Note:
- Undo Part B Updation will only remove the Part B details from the transaction. It will not have any impact on the status of the e-Way Bill on the portal. So, you will have to undo the Part B updation on the portal, and then update the e-Way Bill report using Undo Part B updation.
- A transaction might appear in the Pending For Part B Updation section, even if you have updated the details on the portal. In such cases, drill down from the Pending For Part B Updation section, select the transaction and press Ctrl+F7 (Mark Part B as Updated). The transaction will move to the Generated With Part B section.
Extend e-Way Bill
You can extend the validity of an e-Way Bill in TallyPrime, in case there is an unexpected delay in the delivery of goods. This might happen due to vehicle breakdown or some other problem. Accordingly, you can extend the e-Way Bill, considering it is still active.
- Drill down from the relevant section in the e-Way Bill report; for example, the With Part B or Without Part B section under e-Way Bill Generated.
- Select the transaction and press F9 (Extend EWB). The e-Way Bill Extension Details screen appears.
- Enter the Remaining Distance (in KM). The validity of e-Way Bill will depend on the value entered here.
- Press Ctrl+A to save.
Now you can send the transaction for e-Way Bill extension using the Exchange menu.
Undo EWB Extension
You may have extended the validity of an e-Way Bill in TallyPrime, due to an unexpected delay in the delivery of goods. However, if the obstacles are cleared and the goods are delivered on time, then Tallyprime also provides you with the option to undo this extension.
- Drill down from the relevant section in the e-Way Bill report; for example, the Pending for e-Way Bill extension screen.
- Select the voucher and press Alt+F10 (Undo Extension). The following screen will appear:
- Press Enter to proceed.
This will remove details of the extension (such as the Reason for extension and Remarks), and the voucher will move to its original section.
Offline e-Way Bill
TallyPrime also allows you to carry out e-Way Bill activities in the offline mode, in case you do not have continuous access to the internet, or if don’t want to send your invoice details directly to the portal. In such cases, you can export the details of your e-Way Bill in the JSON format and then upload it the portal at your convenience. TallyPrime creates the offline files in the prescribed format and size limit. If the data size is more than 4 MB, the information is split into multiple files, each of which will be less than 4 MB.
In this section
- Generate e-Way Bill
- Update Part B/Transporter ID
Generate e-Way Bill
Offline Export
- Press Alt+Z > Send for e-Way Bill. The Send for e-Way Bill screen appears. You can view the transactions that are pending for generation.
- Select the required transactions and press X (Offline Export) to export the details. If you press X without selecting any transaction, then all the applicable transactions will be exported.
The following confirmation screen will appear, with the number of transactions lined up for e-Way Bill generation.
- Press Enter to continue. The Export screen will appear.

- Press C (Configure), if you want to change the details, such as the Folder path where JSON files will be exported.
- Press E (Send) to export the JSON files.
The JSON files will be saved in the specified folder:
Bulk Upload on the Portal
After exporting the JSON files, you can upload them on the portal and generate e-Way Bill information for the selected vouchers.
- Open the e-Way Bill portal and go to one of the following links:
- e-Way Bill > Generate Bulk.
- Consolidated EWB > Generate Bulk.
- Click Choose File > select JSON > click Upload & Generate. The e-Way Bill gets generated.
Update Part B/Transporter ID
Apart from e-Way Bill generation, TallyPrime provides you with the option to update the Part B and Transporter ID for the e-Way Bill. Similar to the offline generation of e-Way Bill, you can export the details of your e-Way Bill in the JSON format and then upload it to the portal at your convenience.
- Press Alt+Z > Send for e-Way Bill. The Send for e-Way Bill screen appears. You can view the transactions that are pending for generation, updation, cancellation, extension, and so on.
- Select the required transactions and press X (Offline Export) to export the details. If you press X without selecting any transaction, then all the applicable transactions will be exported.
The following confirmation screen will appear, with the number of transactions lined up for e-Way Bill activities.
- Press Enter to continue. The Export screen will appear.
- Press C (Configure), if you want to change the details, such as the Folder path where JSON files will be exported.
- Press E (Send) to export the JSON files.
After exporting the JSON files, you can upload them on the portal and generate e-Way Bill information for the selected vouchers.
e-Way Bill Report
The e-Way Bill report is a one-stop shop for your e-Way Bill needs in TallyPrime. You can view the e-Way Bill status of your transactions, and take the next steps accordingly. You can perform operations such as e-Way Bill generation and cancellation for one or many transactions. The e-Way Bill report also allows you to view the transactions where the details are incomplete or incorrect, and update the required information. You can also open the the e-Way Bill portal directly from the report, if required, by pressing Alt+V (Open EWB Portal).
- Gateway of Tally > Display More Reports > GST Reports > e-Way Bill, and press Enter.
Alternatively, Alt+G (Go To) > type or select e-Way Bill, and press Enter.

- e-Way Bill Register
The e-Way Bill Register is a single location where you can check the e-Way Bill status and other details of your transactions in a particular period. If required, you can also remove e-Way Bill information from certain vouchers by pressing Alt+V (Remove EWB Info).
- Uncertain Transactions (Corrections needed)
This section lists the transactions where there is mismatch or incomplete information in the voucher, ledger, or stock item. You can drill down from the transactions and resolve the uncertainties. You can also accept the transactions as is, or recompute the values, if needed.
- Missing/Invalid Information
This section lists the transactions that have missing or invalid Information, which needs to be corrected before the e-Way Bill can be generated. The sub-sections include the transactions where HSN/SAC details are not provided, and the transactions where the information required for e-Way Bill generation is not provided. Once you resolve these transactions, they will appear under Pending for Exchange with e-Way Bill System > For e-Way Bill Generation.
- Rejected by e-Way Bill System
This section lists the transactions where e-Way Bill generation/cancellation requests were rejected by the portal. The rejection can happen due to reasons such as duplicate e-Way Bill number, invalid HSN code, and so on. After drilling down, you can see the reasons for rejection (as per the portal) in the e-Way Bill Details screen. Subsequently, you can drill down to the voucher and re-generate the e-Way Bill.
- Pending for Exchange with e-Way Bill System
This section lists the transactions that are ready to be sent to the portal, as they have no uncertain or missing information. This includes the transactions ready for e-Way Bill generation/cancellation/extension, or updation of Part B/Transporter ID. You can proceed to the Exchange menu (Alt+Z (Exchange) > Send for e-Way Bill), and send the transactions to the portal.
- Exported
After the transactions are successfully exported for e-Way Bill generation or updation of Part B/Transporter ID, they will appear in the Exported section.
- e-Way Bill Generated
This section lists the transactions where the e-Way Bill is generated (with or without Part B) from the portal, or manually updated in the offline mode using TallyPrime or other software. You can further update e-Way Bill information for the required transaction by pressing Alt+Q (Manually Update EWB Info).
- e-Way Bill Cancelled
This section lists all the transactions where the e-Way Bill is cancelled from the portal, or manually marked as cancelled in the offline mode in TallyPrime or other software.
- User-Excluded Transactions
This section lists the transactions that you have chosen to exclude from the e-Way Bill process. However, if you want to include certain transactions from this list for e-Way Bill activity, then you can select the transactions and press Alt+H (Include).
e-Way Bill in Releases Earlier than TallyPrime 2.0
Important Announcement
National Informatics Centre (NIC) has made certain changes in the JSON schema for e-Way Bill (EWB). These changes are expected to go live on 1st July 2021. Therefore, the existing tools for e-Way Bill JSON Preparation and Consolidated e-Way Bill JSON Preparation will stop working and the JSON file generated from TallyPrime for EWB may fail during Upload.
We have made necessary enhancements in the product to address these changes, which will be available TallyPrime Release 2.0 onwards. Therefore, we urge you to upgrade to the latest release of TallyPrime at the earliest.
However, if you need time to upgrade to the latest TallyPrime release and want to continue generating e-Way Bill from your existing TallyPrime release, refer to the steps mentioned in the Export Data to JSON Preparation Tool and Create JSON section. The latest offline tool can be downloaded from
TallyPrime supports the e-Way Bill JSON Preparation Tool, Version 1.0.0219. In TallyPrime, you can enter e-Way Bill details only when such transactions are recorded with stock items. The provision to enter e-Way Bill details is not available in accounting invoice mode, and in companies enabled to Maintain only accounts.
Setup for e-Way Bill
- Open the company and press F11 (Features) > set Enable Goods and Services Tax (GST) as Yes.
- In the Company GST Details screen, under the e-Way Bill options, specify the applicable date, threshold limit, and the value to be considered for the threshold limit, based on your business requirement.
You can enable the option Applicable for intrastate and enter the Threshold limit, based on the applicability of e-Way Bill for your state. The threshold limit will be applied for the transactions recorded.
In the party ledger, if you have selected the Registration type as:
- Regular or Composition: The GSTIN/UIN is considered as the transporter ID.
- Unknown or Unregistered: Enter the 15-digit Transporter ID.
If the Transporter ID is incorrect, the message appears as shown:
Record Invoice with Details Required for e-Way Bill, and Create JSON
When you enable e-Way Bill for a company, the option Export e-Way Bill details from invoice after saving? is also enabled in the Voucher Configuration screen.
- Gateway of Tally > Vouchers > press F8 (Sales).
Alternatively, press Alt+G (Go To) > Create Voucher > press F8 (Sales).
- Select the party ledger, sales ledger, stock items, and tax ledgers.
As in other transactions, you can create the ledger or stock item on the fly by pressing Alt+C. Alternatively, press Alt+G (Go To) > Create Master > type or select Ledger > and press Enter.
- Set the option Provide GST/e-Way Bill details to Yes, it appears when the invoice value is above Rs.50,000. Press Enter to view the Statutory Details screen.
A POS invoice is issued in the check-out counter of a shop, and the goods are generally carried by the buyer. Hence, the option Provide GST/e-Way Bill details will not appear in a POS invoice. If the supplier agrees to deliver the goods and the transaction value exceeds the threshold limit of e-Way Bill, you can enter the transport details from e-Way Bill reports.
- In the Statutory Details screen, enter the mandatory details required for generating the e-Way Bill.
Press F12 (Configure) to:
Enable consolidated e-Way Bill details – enter the details required for generating a consolidated e-Way Bill.
Show state name for Dispatch From and Ship To – select the state name under Dispatch From and Ship To sections.
Show consignor details – update your company address details.
- Check the distance between the pincodes entered for Dispatch From and Ship To on the e-Way Bill System (e-Way Bill system > Search > Pin to Pin distance).
- Enter the Distance (in KM) based on the Pincode entered in Dispatch From and Ship To sections of e-Way Bill Details screen.
- Enter the distance manually for the first time.
- Based on the combination of same party ledger and pincodes entered in the e-Way Bill Details screen of previous invoice, the distance will be prefilled for the subsequent invoices.
- If the prefilled distance is changed in the e-Way Bill Details screen of any of the invoices, the updated distance will get prefilled for the subsequent invoices.
If you enter the Distance for the first time, the same will be retained for the combination of same party and pincodes. You can change it, if required. If you press Spacebar on the Distance field, the Distance will reappear, as it cannot be left blank.
- For transport by:
- Road, you can either enter the Date and Vehicle number, or Date and Transporter ID.
- Rail/Air/Ship, you have to enter the Date along with either the Doc. No., Lading No., RR No., or AirWay No.
- If goods are transported in different modes or vehicles, press Alt+R (Transporter Details) to enter the Transporter’s Details. Enter the distance manually for the first time.
- Based on the combination of same party ledger and pincodes entered in the previous invoice, the distance will be prefilled in the Transporter’s Details screen for the subsequent invoices.
- If the prefilled distance is changed in the e-Way Bill Details screen of any of the invoices, the updated distance will get prefilled for the subsequent invoices.
- Accept the Transporter’s Details screen.
- Press Alt+W (e-Way Bill Details) to enter the details of multiple e-Way Bills generated for a single transaction.
- In the e-Way Bill Details screen, enter the e-Way Bill No. and Date for each Sub Type along with the Document Type and Status of e-Way Bill. You can now select SKD/CKD/Lots, as per the new e-Way Bill requirements.
- If you are updating the consignor and consignee details, enter the pincodes for both. Based on these pincodes, manually enter the Distance in the Transporter Details (when the option Update Transporter Details is enabled) or e-Way Bill Details (if transporter details are not updated), for the first time.
- Based on the combination of same party ledger and pincodes entered in the previous invoice, the distance will be prefilled in the Transporter’s Details or e-Way Bill Details for the subsequent invoices.
- If the prefilled distance is changed in the Transporter’s Details or e-Way Bill Details of any of the invoices, the updated distance will get prefilled for the subsequent invoices.

- Accept the e-Way Bill Details screen.
- Accept the screen. As always, you can press Ctrl+A to save.
The Export Details for e-Way Bill screen appears.
- Press Enter to create a JSON file. The folder in which the JSON is created now appears.
- Upload the JSON file to the portal to generate the e-Way Bill.
- Return to the invoice in TallyPrime Enter the e-Way Bill No. and e-Way Bill bin the Update e-Way Bill Information screen.
You can update these details in the Update e-Way Bill Information report as well. To create one JSON for multiple invoices from the Invoice Ready for Export section of e-Way Bill Report. If you have configured the voucher type to print after saving, you can print the invoice with e-Way Bill number. If you had entered e-Way Bill details in delivery note and tracked it to sales invoice, you need to manually enter the same details of e-Way Bill in the sales invoice.
Mandatory details missing in invoice
If the mandatory details required for generating e-Way Bill are not provided or specified incorrectly, a message appears while saving the voucher. You can provide the details by referring to the message.
Altering an invoice
If you alter the invoice and the total value exceeds Rs. 50,000, the option Provide GST/e-Way Bill details appears to enter the e-Way Bill details. It prompts for generation of JSON on saving the invoice. You can also create JSON at a later point in time, by pressing Ctrl+E in the alteration mode of the invoice.
UQC for e-Way Bill
The list of Unit Quantity Code (UQC) provided by GSTN for GSTR-1, does not match with the list provided by NIC for e-Way Bill. Also, the availability of UQC is not mandatory for generating the e-Way Bill. Hence, the export of UQC mapped to the stock items selected in the invoice, is not supported in TallyPrime. Once the list of UQC provided by NIC matches with that of GSTN, the required changes will be made available in TallyPrime.
e-Way Bill option not appearing in the invoice – Probable causes and solution
You can do the following if the option Provide GST/e-Way Bill details is not appearing in the invoice.
- Type of Supply – Ensure Goods is selected as Type of Supply. If you have selected Services, e-Way Bill option will not appear.
- Voucher creation screen – make a note of the voucher date, voucher amount, and whether it is an interstate or intrastate transaction. Then check if:
- The option e-Way Bill applicable is set to Yes in the Company GST Details screen (from F11 (Feature)).
- The voucher date is on or after the Applicable from date set for e-Way Bills.
- The voucher amount is above the, Threshold limit set for interstate or intrastate transaction, based on the Invoice value, Taxable and exempt goods value or Taxable goods value, as defined for the option Threshold limit includes.
- Make the required changes and save the screen.
- Record a new transaction, enter the amount and date, and check if the option Provide GST/e-Way Bill details is appearing in it.
- If the option does not appear, rename the tallycfg.tsf file in Tally folder and recheck the date and values in the voucher. Ensure the relevant options are enabled in the Company GST Details screen.
- Voucher alteration screen – in the e-Way Bill Reports:
- Check if the invoice is appearing in the Invoices Exported section of the report (as the e-way Bill details were exported for creating the JSON file).
- Press Ctrl+I (More Details) to check if the e-Way Bill details are available.
- If difficulty persists, go to Export for e-Way Bill report. In the:
- Information required for e-Way Bill not provided section, check if the transaction is available and resolve the exception.
- Invoices Ready for Export section, check if the transaction is available.
e-Way Bill for Exports, Imports and Transactions with SEZ Units
- If you select the Nature of transaction provided for Exports:
- Select:
- The State as Other Countries under Bill To.
- The Indian state or other territory in which the airport, shipping yard or border check post is located, under Ship To.
- Enter the Pincode of the location (airport, shipping yard or border check post) from where the consignment is exported. A note appears to indicate this information.
- The GSTIN appears as URP, under Bill To.
- If you select the Nature of transaction provided for Imports:
- For purchases, if you select the Nature of transaction provided for SEZ:
- The party’s GSTIN will appear under Bill From section.
- The State under Bill From section appears as Other Countries. Select the Indian state or other territory in which the airport, shipping yard or border check post is located under Dispatch From.
- You can enter the Pincode of the location (airport, shipping yard, or border check post) to which the consignment is received.
- For sales, if you select the Nature of transaction provided for SEZ:
- The party’s GSTIN will appear under Bill To section.
- Enter the Pincode of the location (airport, shipping yard, or border check post) from where the consignment is dispatched.
Upload JSON file to portal
- In the GST portal, click e-Way Bill System > Click here to go to e-Way Bill Portal.
- To generate the e-Way Bill, choose the required links:
- e-Waybill > Generate Bulk
- Consolidated EWB > Generate Bulk
- Click Choose File > select JSON > click Upload & Generate. The e-Way Bill gets generated.
Print the invoice with e-Way Bill number
If the voucher type is enabled to Print voucher after saving, the Voucher Printing screen appears on saving the voucher. If not, go to alteration mode of the invoice and press Ctrl+P (Print). In the Voucher Printing screen:
- Press C (Configure).
- Ensure the option Show e-Way Bill No. is set to Yes.
- Accept the Print Configuration screen.
- Press Esc and press P (Print) to print the invoice.

In this report, you can:
- Resolve the exceptions by entering the mandatory details that were not provided during voucher entry.
- Check the invoice status to export or update e-Way Bill number and date.
- Create JSON or export data to JSON preparation tool
To view the details of the report, you can do the following:
- Press Ctrl+B (Basis of Values) to configure the values in your report for that instance, based on different business needs.
- In Export for e-Way Bill Report, you can set Threshold limit for Interstate and Intrastate. Press Ctrl+B (Basis of Values) > Set Threshold limit for Interstate > press Enter and set the Value. Press Esc to view the default values.
Similarly, you can include URD purchases, Non URD purchases, etc.
- Press Ctrl+H (Change View) > type or select Voucher-wise Report > press Enter. Press Esc to view the default report.
- Press Shift+Enter on each invoice under Invoices Ready for Export and Invoices Exported, to view the transport details of each invoice.
In this section
- Status-wise View of e-Way Bill Report
- HSN Code not specified
- Information required for e-Way Bill not provided
- Invoices Ready for Export
- Invoices Exported
- Excluded by User
- Voucher-wise View of e-Way Bill Report
Status-wise View of e-Way Bill Report
- Gateway of Tally > Display More Reports > Statutory Reports > GST > e-Way Bill > Export for e-Way Bill.
Alternatively, press Alt+G ( Go To) > type or select Export for e-Way Bill > and press Enter.
The report appears for one day. You can change the date or period, if required.
- Press F2 (Date) to change the date. Press Alt+F2 (Period) to change the period, if needed.
- Press F12 (Configure), and enable the options to view purchases made from unregistered and other dealers and sales returns.
- If you have tracked delivery notes in sales, you can view only sales or delivery note or both sales and delivery notes. You can also change the threshold limit of the transaction to view the relevant vouchers in the report.
The option Include Tracked Vouchers will appear only if delivery note and receipt note voucher types are enabled.
HSN Code not specified
Displays the count of transactions for which HSN code is not defined.
- Select the exception HSN Code not specified, and press Enter.
- Select the required stock item.
- Enter the HSN/SAC Name and HSN/SAC.
- Accept the screen. As always, you can press Ctrl+A to save.
Information required for e-Way Bill not provided
Displays the count of transactions for which mandatory details required for generating e-Way Bill are not provided. If a POS invoice value exceeds the threshold limit provided for e-Way Bill, the transaction appears here.
- Select the exception Information required for e-Way Bill not provided, and press Enter.
- Skip Validation: Press Alt+S (Skip Validation) for vouchers that you want to accept without validating the following:
- Transporter ID
- Vehicle number
- GSTIN/UIN
- Pincode
- Distance
This button will be activated only for vouchers in which these details are not available in the format provided by the department.
- Press Enter to accept.
The State field appears under Dispatch From and Ship To sections in e-Way Bill details screen of the invoice. If you have not selected the State name under Bill From, Dispatch From, Bill To or Ship To, the invoice will appear as an exception. To resolve this exception, you need to select the Indian State or other territory.
While resolving the exception, Other Countries will not be listed for selection as per the latest requirements of e-Way Bill.
- For the other exceptions, you can do one of the following:
- Press Alt+H (Exclude Vouchers), to exclude a transaction from this report.
- Press Alt+W (Update Details) and enter the e-Way Bill Details for sales and POS invoice.
- Select the required voucher, and press Enter.
- Enter the Consignor Pincode and Consignee Pincode. If you had entered the distance in any of the previous invoices for these pincodes and party ledger combination, the Distance will be prefilled. You can edit this distance if required.
- Enter the other missing details (for sales and POS invoices).
- Accept the screen. As always, you can press Ctrl+A to save.
Invoices Ready for Export
Displays the count of transactions which have all the mandatory details required for generating e-Way Bill, and are ready for export.
- Select Invoices Ready for Export and press Enter.
- Press F12 (Configure) and enable the options Show Taxable Amount and Tax Amount and Show Tax types in separate columns, to view the taxable value and tax amount in separate columns.
When the option Assessee of other territory is enabled in Company GST Details screen, the column for UT Tax Amount will appear instead of State Tax Amount.
- Press Shift+Enter on each invoice, to view the transaction types inferred based on the States selected in the e-Way Bill Details screen.
- Press F4 (Party) to select a particular party ledger, and display the relevant transactions.
- Press Ctrl+H (Change View) to view the details of a report in different views with additional details or for a specific period. You can also view other reports related to the current report.
To view the Update e-Way Bill Information for e-Way Bill – Voucher Register, press Ctrl+H (Change View) > type or select e-Way Bill – Voucher Register > press Enter. Press Esc to view the default report.
- Press Alt+H (Exclude Vouchers), to exclude a transaction from this report.
- Press Alt+V (Open e-Way Bill Portal)to open the GST portal.
- Select the required transaction (press Spacebar to select more than one transaction), and press Alt+E (Export) > e-Way Bill to export.

- Press E (Send) to create the JSON file.
Invoices Exported
Displays the count of transactions which are exported in MS Excel or JSON format.
- Select Invoices Exported and press Enter.
- Press F12 (Configure) and enable the options Show Taxable Amount and Tax Amount and Show Tax types in separate columns, to view the taxable value and tax amount in separate columns.
- Press Shift+Enter on each invoice, to view the transaction types inferred based on the States selected in the e-Way Bill Details screen.
- Based on the location of the party selected (under Bill To, Ship To, Bill From and Dispatch From) in the invoice, the Transaction Type appears in this report.
- Regular – appears when the State or location selected in the sections:
- Bill From and Dispatch From is same, or
- Bill To and Ship to is same.
- Bill To – Ship To – appears when the same State is selected under Bill From, Dispatch From, and Bill To.
- Bill From – Dispatch From – appears when different States are selected under Bill From and Dispatch From are different, but the same State is selected under Bill To and Ship To.
Bill To – Ship To and Bill From – Dispatch From – appear when different states are selected under Bill From, Dispatch From, Bill To, and Ship To.
- Press F4 (Party) and select the required party ledger.
- Press Ctrl+H (Change View) to view the details of a report in different views with additional details or for a specific period. You can also view other reports related to the current report.
To view the Update e-Way Bill Information for e-Way Bill – Voucher Register, press Ctrl+H (Change View) > type or select e-Way Bill – Voucher Register > press Enter. Press Esc to view the default report.
- Press Alt+H (Exclude Vouchers), to exclude a transaction from this report.
- Press Alt+V (Open e-Way Bill Portal), to open the GST portal.
- Press Alt+E (Export) > select e-Way Bill to export the transactions to MS Excel or JSON format. This button is highlighted only on selecting transactions that do not have e-Way Bill number and date.
- Press Alt+W (Update Details) to enter the e-Way Bill number and date.
Excluded by User
Displays the count of transactions which excluded from the e-Way Bill report.
- Select User-excluded Transactions and press Enter.
- Press Alt+H (Include Vouchers) to include the transaction in the report.
Voucher-wise View of e-Way Bill Report
In the Status-wise View of Export for e-Way Bill report, press F8 (Voucher-wise View) to display the transaction details.
Update e-Way Bill Information
Displays invoices for which e-Way Bill number and date are not provided.
- Gateway of Tally > Display More Reports > Statutory Reports > GST > e-Way Bill > Update e-Way Bill Information.
Alternatively, press Alt+G (Go To) > type or select Update e-Way Bill Information > and press Enter.
You can also press Ctrl+H (Change View) from the Export for e-Way Bill report to view this report.
- Select the required party, and press Enter. The report appears for only one day. You can change the date or period, if required.
- Press F12 (Configure) and set the options, as required.
- You can press F8 (Status-wise View) to view the report based on invoice status.
- Press Ctrl+B (Basis of Values) to configure the values in your report for that instance, based on different business needs.
In Update e-Way Bill Information Report, you can set Threshold limit for Interstate and Intrastate. Press Ctrl+B (Basis of Values) > Set Threshold for Intrastate > press Enter and set the Value. Press Esc to view the default values.
Similarly, you can include URD purchases, Non URD purchases etc.
- Press Ctrl+H (Change View) to view the details of a report in different views with additional details or for a specific period. You can also view other reports related to the current report.
To view the Status-wise report for Update e-Way Bill Information, press Ctrl+H (Change View) > type or select Status-wise > press Enter. Press Esc to view the default report.
- Enter the e-Way Bill No., e-Way Bill Date, Consolidated e-Way Bill No. and Consolidated e-Way Bill Date, as applicable for each transaction.
- Save the report.
e-Way Bill Report
Displays invoices that have e-Way Bill number and date.
- Gateway of Tally > Display More Reports> Statutory Reports > GST > e-Way Bill > e-Way Bill Report.
Alternatively, press Alt+G (Go To) > type or select e-Way Bill Report > and press Enter.
- You can press Ctrl+H (Change View) from Export for e-Way Bill or Update e-Way Bill Information reports to view this report.
- In this report, you can:
- Press F4 (Party) and select the required party ledger.
- Ctrl+H (Change View) – You can display the details of a report in different views with additional details or for a specific period. You can also view other reports related to the current report.
- Press Alt+V (Open e-Way Bill Portal) to open the GST portal.
- Press Alt+W (Update Details) to enter the e-Way Bill number and date.
Consolidated e-Way Bill
- Gateway of Tally > Display More Reports > Statutory Reports > GST > e-Way Bill > e-Way Bill Report.
Alternatively, press Alt+G (Go To) > type or select e-Way Bill Report > and press Enter.
- Press F8 (Consolidated View) to view the grouping based on mode, vehicle number, place and state.

- In this report, you can:
- Press F8 (Invoice-wise) to view the details of individual invoices.
- Select more than one invoice (press Spacebar), press Alt+B (Update Consolidated Info.) to enter the consolidated e-Way Bill invoice number and date.
- Ctrl+H (Change View) – You can display the details of a report in different views with additional details or for a specific period. You can also view other reports related to the current report.
- Select more than one invoice (press Spacebar), and press Alt+E (Export) > select Consolidated e-Way Bill > and press Enter. To create JSON for consolidated invoices as shown below:

The options in Update Consolidated Details appear only when the details are not provided in the invoices selected for export. The Mode, Vehicle No., From Place and State entered here, will be updated in the invoices.
- Press Alt+V (Open e-Way Bill Portal) to open the GST portal.
Export Data to JSON preparation tool, and Create JSON
When you save the invoice enabled with the option to Export e-Way Bill details from invoice after saving, the Export Details for e-Way Bill screen appears. The default format is set to JSON e-Way Bill Details (Data Interchange). To download the tool, and export:
- Press Alt+V (Open e-Way Bill Portal) from Export for e-Way Bill or e-Way Bill Reports, to open the GST portal.
- Press e-Way Bill System > Click here to go to e-Way Bill Portal.
- In the e-Way Bill system, click Help > Tools > Bulk Generation Tools.
- Under JSON Preparation Tools, click E-Waybill JSON Preparation (Generation of EWB by Common enrolled transporter included in this version). The file EWB_Preparation_Tool.xlsm gets downloaded.
- Copy the downloaded file to the Export Location of TallyPrime.
- In the Export for e-Way Bill screen, press Ctrl+E (Export).
- Select Excel (Spreadsheet) as the Format. If the template is not available in the Export Location, the message appears as shown:
Download the tool from the e-Way Bill System of the GST portal and copy it in the Export Location of TallyPrime.
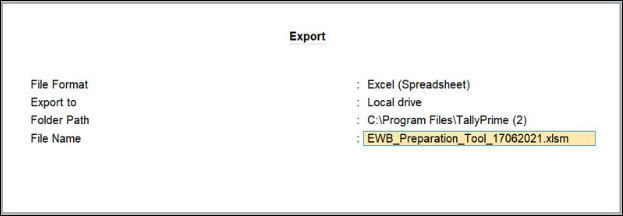
- In the Export screen:
- Select Excel (Spreadsheet) as the File Format.
- Specify the Folder Path. By default, the specified path is the TallyPrime Installation folder path.
- Verify and update the File Name, if needed.
- Ensure that the latest tool is available in the specified path or Export cannot be carried out.
- Ensure that the File Name in the Export screen is the same as the name of the tool. Otherwise, Export will fail. You can do the following:
- Copy the name of the tool and append to the File Name.
Alternatively, rename the tool and add the same name to the File Name in TallyPrime.
- Add the extension .xlsm if not available. A sample image is shown below:
Once done, the tool will be updated with the details.
- Update any other mandatory details (specified with asterisk *) as per the tool and click Validate to verify the details.
- On successful validation, click Prepare JSON.
JSON will be generated in the folder where the tool is located.
- Upload the JSON file to the portal to generate the e-Way Bill.
CA. Shivesh Khandelwaal is a practicing Chartered Accountant experienced in accounting automation, compliance management, and audit support. He has worked with trading and distribution businesses to improve inventory visibility and financial reporting. His articles focus on real-world applicability.